VR Design & Development

VR Design & Development

The following projects were completed as part of the M.Sc Human-Computer Interaction course in Bauhaus-Universität Weimar.

Virtual Reality

This module involved learning about the concepts existing in current Virtual and Augmented Reality. For all projects we used an in-house system called Avango Guacamole to create 3D environments and implemented various interaction techniques useful in an immersive 3D environment. The programming language was through Python. The video shown below is our team of two’s final project.

Behind the Mask 360 (Virtual Reality Design)

This course was an elective and involved the creation of various low-cost virtual reality assets. These assets were often centralised around the Google Cardboard, a cheap VR solution. Early on in the course we were allowed to think of different themes or scenarios where the discussed concepts could be used. I decided on a Sci-Fi exploration adventure theme that would be central to the completed assignments. Multiple technologies were used to create VR assets like photospheres, 3d models and special effects. The below list is a short summary.

  • Google Photosphere, Photoshop and Spherecast (temporary online Viewable VR images)
  • TouchDesigner (3D environment spheres and special effects)
  • Blender, 123DDesign (3D modelling)
  • Unreal Engine (360 3D environment and game engine)

Many of the techniques learned through using these technologies went into the final assignment. Here a 3D environment was modelled using Unreal Engine. Due to the lack of rendering and processing power it was not possible to create a seamless video of the 3D scene. Thus, a 360 viewable video slideshow was edited that showed the most notable spots in the environment. This assignment also involved designing a wearable mask with the Google Cardboard suitable for the Sci-Fi theme. Samples of the work can be seen below. A 3D model of the mask can also be spotted in the 360 video!
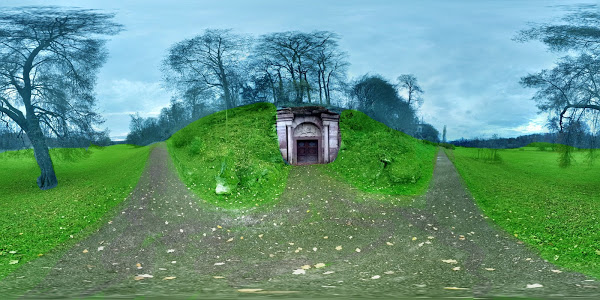
Photosphere

Magnet Stylus Android App

Magnet Stylus Android App

Mobile Information Systems – Magnetic Stylus Android app

During the Mobile Informations Systems course of the M.Sc. Human-Computer Interaction program, various Android applications were built to explore the different aspects of mobile communication, data retrieval and visualisation.

For the final project our teams of two people were asked to remake a mobile application from an academic paper. The resulting application can be seen below and is using an neodymium magnet.

FYP – Lifeguard Examination Animation

Final Year Project – Lifeguard Examination Animation

The purpose of this animation was to help the participants of the exam understand the exam process on the day. The examiners can see what the queuing process is like. In essence it is an instructional video. All of the icons and characters were created in Adobe Illustrator. These were then imported into Adobe After Effects for animation. Once I had completed these animations I did some further editing and post-processing in Final Cut Pro X to arrive at the final product. The two most useful resources for creating this animation were the Creative Cow Youtube playlist and this video on Puppet Pin animation.

DocuPal – Applied Interaction Design

DocuPal – Applied Interaction Design

For this college module, we had to choose a topic that we wanted to explore. We were allowed to choose any topic. This topic would then be explored using either a ‘design game’ or ‘design probes’. Our team of two decided to do a design game on the software product development process.

This game was based loosely on the concept of Apples to Apples. The video below demonstrates how the game worked.

The sticky note solutions from the design game were all collected and analysed. After getting inspiration from these solutions, we had to come up with a final design solution. After brainstorming ideas and sketching a simple graphic user interface I ended up with this final design concept and prototype:

This video was made using Axure RP, Final Cut Pro X and Adobe Illustrator.

A brief description of how the interaction was prototyped:

  • A clickable prototype was made in Axure RP.
  • I then took a video of the screen as I was completing a task normally in Microsoft Word.
  • I edited a GUI into this video and placed it back on the smartphone.
  • Finally, I filmed myself pretending to use the application.

The final result is DocuPal, a prototype of an application that can assist people in using documentation for software.

Work Experience – Hungry Bungry Promotional Video 2

Work Experience – Hungry Bungry Promotional Video 2

This video showcased how the business owner could benefit from using Hungry Bungry. The video was fully edited using Final Cut Pro X, but was not posted online because the website shown during the video was still being worked on. An animation at the beginning was made using Adobe After Effects. Icons were made in Adobe Illustrator

Animation sample image

Animation sample


video sample image

Video sample


icon video image

Use of icons in the video

Work Experience – Hungry Bungry Promotional Video 1

Work Experience – Hungry Bungry Promotional Video 1

This video was created to show potential customers  how they could order food online using Hungry Bungry. The video was partially filmed on the University of Limerick campus. Screen capture was done to show the features of the website. A small animation was done using After Effects. Video and sound was edited in Final Cut Pro X. Camera was Samsung ST200F.

Video and Audio Production – Year 2 (Semester 2)

Video and Audio Production – Year 2 (Semester 2)

Our second project of the semester was to create a video using our own Foley sound effects and ADR (Audio Dialogue Replacement). Foley sound was recorded separately and ADR was recorded in a studio. A green screen was used for the treetop scene which was later colour keyed in Adobe After Effects. The video was edited in Final Cut Pro 7 and the audio was edited in Pro Tools.

My roles: Director, Video Editor, Script, Actor

Foundations Of Interaction Design – First Year (Semester 2)

Foundations Of Interaction Design – First Year (Semester 2)

Introduction

This module introduced some basic Interation Design (IxD) concepts. This included a description of the IxD process which is split into different phases, which are: the ‘Understand Phase’, the ‘Design Phase’ and the ‘Prototype Phase’. Throughout the year these steps were followed, where the aim was to simulate the practice of an actual IxD project, with the exception of a working interactive installation. The topic of the project was ‘Environmental Awareness On The Campus‘.

IxD Process

By using diagrams, keywords and brainstorming, problems with environmental awareness were identified and a topic was chosen for our team. We decided on ‘power consumption on campus’. In order to understand the topic we used IDEO cards. These cards outlined:

  • The use of secondary research
  • Surveying and behaviour tracking methods
  • The importance of first hand evidence (i.e. Photos, Videos)

During the ‘Design Phase’ the IDEO ‘Try’ cards were used. Narratives and storyboards were then made to conceptualize our imagined interactive installations.

Finally, a paper prototype was constructed and filmed. This video, entitled: ‘Battery Hunt’ was then edited and put online.